For quite some time I have had my eye on several keyboards. Many of them have a way to have a keyboard and a mouse in a single device. Usually the better keyboards are mechanical, and some have a TrackPoint, a somewhat reasonable compact mouse. The mechanical keys and TrackPoint combination allows you to keep your hands in a single place, therefore possibly speeding up productivity by reducing the keyboard distance to mouse and readjustment time of hand placement. The one keyboard I want to get my hands on is the Ultimate Hacking Keyboard, but so far it's still in development. Since I'm a bit impatient I think there are ways of achieving some of the same functionality. Alas, the Mistel Barocco keyboard with TrackPoint.
Below is a list of parts, and a guide on software in order to make all of this work.
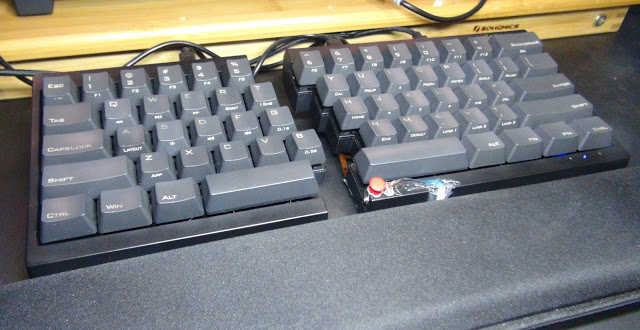
Mistel Barocco Ergonomic Split PBT Keyboard.
- Pros: compact, more ergonomic than traditional keyboards, partially programmable, programmed keys are retained in the device's internal memory, layers (one for normal keyboard, one as a keypad, etc), cherry mx brown keys are quieter than blue ones and they still feel great, the left space bar can have a separate function than the right space bar, has a bezel that is side enough for attachment of the TrackPoint.
- Cons: Not all keys are programmable (some are reserved), I wish it had activation of mouse buttons/keys, sometimes the left-side of the keyboard loses power (the spiral/coiled cable is not good, a better cable helps, even though you loss some of the flexibility), there is no Windows software, the Fn + A key is for switching style (querty, dvorak, colemak) which is easy to accidentally press (it's right next to the volume down shortcut).
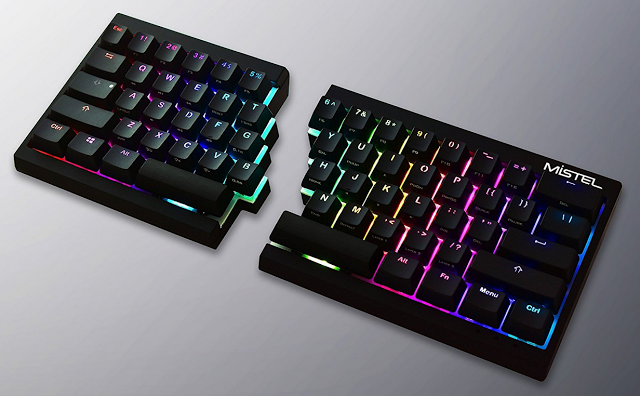
- Suggestion: Get the backlit version (I bought the non-backlit before the backlit versions came out).
- Links: official, amazon.
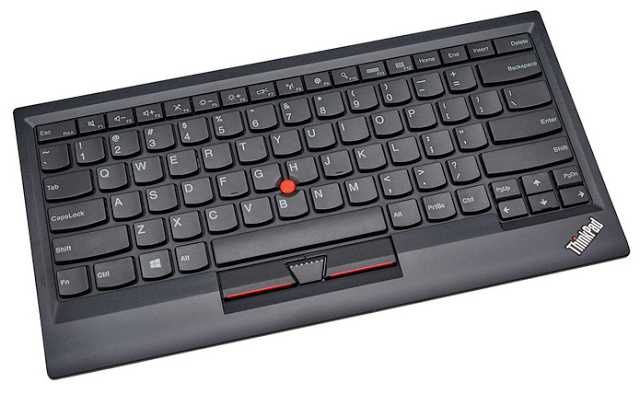
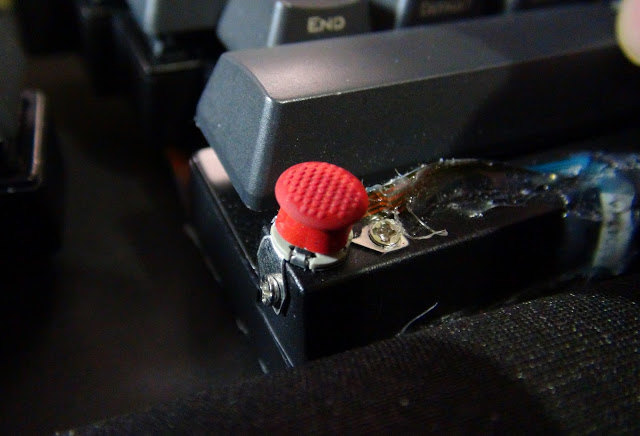
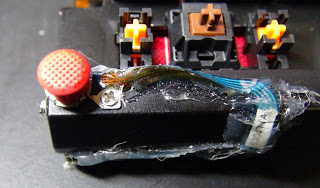
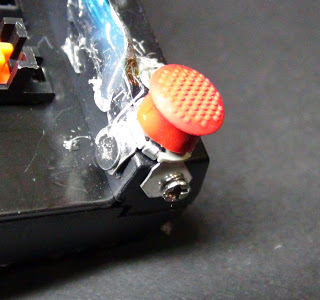
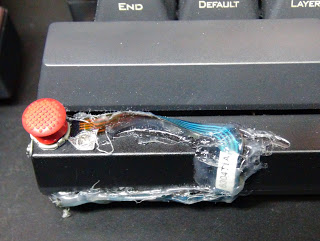
- We are going to extract the TrackPoint from a Lenovo ThinkPad Compact USB Keyboard with TrackPoint. This keyboard is compact, but has thin keys, poor design on the directional/pgUp/pgDown keys, and an insufficient palm rest. So it's not the type of keyboard that I want to work with over the long run. The TrackPoint though is easy to remove and easy to attach to the Mistel Keyboard.
- Notes: The case is easy to disassemble as there are no screws, it's all glue.
- Links: official, amazon.
ASSEMBLY
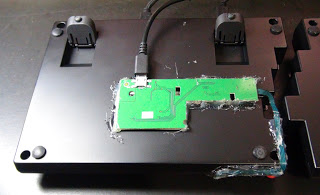
- I'm sorry for not providing more pictures, but I have already tossed the Lenovo keyboard plastic container and keyboard. So below are just the parts needed to complete the project.

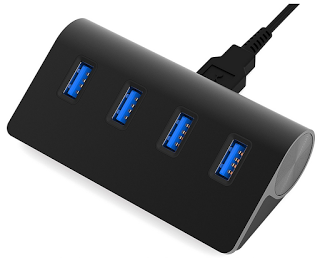
- The Mistel Keyboard takes one USB port, and the TrackPoint portion takes one more. I think it would be better to have a single USB connection, and for this reason we need a hub.
- Links: Sabrent USB Hub.
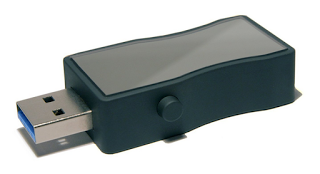
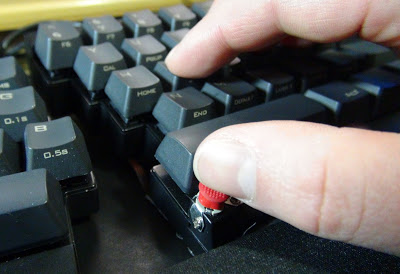
- The TrackPoint is not a perfect mouse solution. Every once in a while the TrackPoint has a "run off". This run off means that the mouse pointer continues to move in a direction against your will. If it's bad enough then one has to unplug/replug the USB cable. So, it is good to have to a button to reset things. One option is the USB On/Off Switch for USB 3.0 by HmbG.
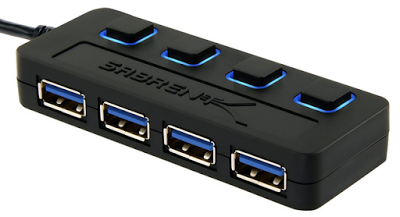
- Instead of having two separate devices wouldn't it make more sense to have a single device that is both a HUB and a switch? Well there are many options for this:
- Links: USB Hub with Switch.
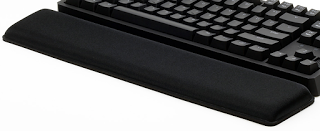
- I like the Max Keyboard foam wrist pads. There is a tenkeyless version (15.25 x 3.25 inches) which I use, but I might be tempted on purchasing the full keyboard version (17.7 x 2.5 inches) which would allow me to separate the Mistel Keyboard.
- Links: 15-inch version, 17-inch version.
- Note: I would NOT get this particular split set of wrist pads as they rather stiff and small. I may try the Goldtouch Gel filled palm supports later on.
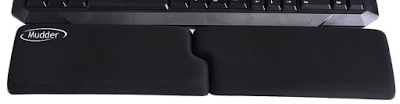
- Note2: I ended getting the Mudder Full Size Keyboard Wrist Rest Pads, which are split style. The pads are memory foamed. They are good so far, and have replaced the Max Keyboard wrist pads.
MODIFYING MISTEL KEYBOARD (VERSION 1)
- We will be using CapsLock to perform commands, but this can become painful as it stresses your little finger (pinky) and even wrist. For this situation I recommend placing the CapsLock key on the left side space bar -- this enables your thumb to be used instead. Yes, you do lose being able to use the left space bar as a space bar, so get used to always using the right side space bar when typing spaces.
-- Press Fn + Ctrl. (starts the programming mode)
-- Press the left space bar key (you may have to do it twice, and note the blinking light).
-- Press the CapsLock key.
-- Press Pn key. (saves)
-- Press Fn + Ctrl. (ends the programming mode)
- NOTES:
-- You could rewrite a number pad in one of the many layers of the Mistel Keyboad, and therefore eliminate another space consuming device from your desk.

- When I attached the TrackPoint to the Mistel Keyboard I lost the mouse left, middle, and right clicks. Because of this we must reprogram mouse behaviors. Once we have our script made, we compile, pin to taskbar, and start it with Windows Task Scheduler. Additionally we can give the process priority so as to prevent software lag/delay. I wish the Mistel Keyboard had the option to program mouse functions, but it doesn't it--so we must do it ourselves.
- Until we have the software set correctly it is imperative to use a traditional mouse.
- Download and install: AutoHotKey website.
Open notepad and create a mkb.ahk file, type in the following and please modify as needed.
; Author: Jesse B Andersen
; Tweaks for keyboard + Trackpoint
SetCapsLockState AlwaysOff
#If (GetKeyState("Capslock", "P") = 1)
 h::Click Left
 n::Click Right
 y::Click Middle
 u::PgDn
 o::PgUp
 m::MouseClick, WheelDown, , , 6
 e::MouseClick, WheelDown, , , 6
 ,::MouseClick, WheelUp, , , 6
 .::MouseClick, WheelUp, , , 6
 w::Home
 ; Middle click scroll
 ;  stops scroll when Capslock released
 g::
  MouseClick middle, , , 1, , D
  KeyWait, Capslock
  MouseClick middle, , , 1, , U
 return
 ; Left mouse drag
 f::
  MouseClick left, , , 1, , D
  KeyWait, Capslock
  MouseClick left, , , 1, , U
 return
 ; Directional arrows
 j::Left
 i::Up
 l::Right
 k::Down
 ; Web Browsing
 s::Browser_Back
 r::F5
 d::Browser_Forward
 ; Switch tabs
 Space::
  Send {LCtrl down}{Tab}{LCtrl up}
 return
 ; Close tab
 c::
  Send {LCtrl down}{w}{LCtrl up}
 return
 ; All enclose symbols
 ; are now on the same keys
 [::(
 ]::)
#If
SetCapsLockState Off
SetCapsLockState AlwaysOff
Notes regarding script:
- You won't be able to use Capslock key to perform an ALL CAPS with the script above because it's used as a way to perform many of the actions. Note that this may work well for people with smaller length fingers, for longer fingers this can get uncomfortable.
CapsLock + [x] key= does
i = up
l = right
k = down
j = left
h = left click
f = left click mouse drag
y = middle click (useful for opening tabs)
g = middle click scroll (released when capslock released)
n = right click
u = page down
o = page up
m or e = scroll down
, or . = scroll up
w = home
s = browser back
d = browser forward
r = F5 (refresh page)
space bar = switch tab
c = close tab
[ = (
] = )
Of course, you can add modify things to suit your needs.
VERSION 2 MODIFICATION (SIMPLER)
; Author: Jesse B Andersen
; Author: Jesse B Andersen
; Tweaks for keyboard + Trackpoint
; Allows CapsLock to remain, some PEOPLE need ALL CAPS.
; More comfortable than having to press CapsLock with left pinky
; Improves function by using hardware settings (aka the directionals)
; Problems: It's easy to switch layers, or change the keyboard style... so it's not perfect.
; Hardware tweaks:
; Note that in some of these you need to use an intermediate key
; like in programming:
;     int x = 5; int y = 2;
;     int temp = x;
;     x = y;
;   y = temp;  // now x has 2, and y has 5
;     so do the same for key swapping
; Change the Fn to left space bar // more comfortable than CapsLock as in previous script
; Change Fn+rightSpaceBar to Ctrl+Tab // for switching browser tab
; Change Fn+ScrollLock to (  // makes all enclosing symbols on same keys
; Change Fn+Pause to )  // makes all enclosing symbols on same keys
; Swap PrintScreen and Home  // faster browsing to top by using right pinky
; Change Pause to Calc // better for our script below
; Change Fn+x to Ctrl+Shift+Fn+Left // selects one word of text to left of cursor
; Change Fn+v to Ctrl+Shift+Fn+Right // selects one word of text to right of cursor
; These will be easy to access with right index finger
PrintScreen::Click Left
Pause::Click Middle
End::Click Right
; Rapid browsing, yes you lose the media options though
Media_Prev::Browser_Back
Media_Play_Pause::F5
Media_Next::Browser_Forward
; Allows left click mouse press and drag,
; you must keep the key pressed down to continue dragging
Volume_Mute::
 if (not GetKeyState("LButton", "P"))
  MouseClick left, , , 1, , D
return
Volume_Mute Up::MouseClick left, , , 1, , U
RAlt::MouseClick, WheelUp, , , 6
RWin::MouseClick, WheelDown, , , 6
VERSION 3 MODIFICATIONS (more comfortable)
; Author: Jesse B Andersen
; Tweaks for keyboard + Trackpoint
; Optional (do at keyboard with programming the layers)
; On the Win key place the left Alt.
; On the left Alt do some shortcut (Win+2) for a command prompt app.
; On the right Alt place the Fn key (this also makes the Fn key acts as pressing Win key).
; Consider also making the CapsLock key do something
;  -- (I do Alt+Tab and pair with VistaSwitcher program with sticky settings on)
SetCapsLockState AlwaysOff
#If (GetKeyState("Capslock", "P") = 1)
y::Click Middle
h::Click Left
n::Click Right
u::PgUp
o::PgDn
j::Left
i::Up
k::Down
l::Right
t::
 Send {LCtrl down}{Tab}{LCtrl up}
return
w::Browser_Back
e::F5
r::Browser_Forward
q::
 Send {LCtrl down}{LShift down}{Tab}{LShift up}{LCtrl up}
return
s::Send {LCtrl down}{s}{LCtrl up}
d::Send {LCtrl down}{f}{LCtrl up}
m::Send {LCtrl down}{Shift down}{Left}{Shift up}{LCtrl up}
,::Send {LCtrl down}{Shift down}{Right}{Shift up}{LCtrl up}
f::Send {LCtrl down}{c}{LCtrl up}
a::Send {LCtrl down}{a}{LCtrl up}
p::MouseClick, WheelUp, , , 6
`;::MouseClick, WheelDown, , , 6
; Left mouse press
g::
 MouseClick left, , , 1, , D
 KeyWait, Capslock
 MouseClick left, , , 1, , U
return
; Switch tabs
Space::{
c:: Send {LCtrl down}{c}{LCtrl up}
v:: Send {LCtrl down}{v}{LCtrl up}
x:: Send {LCtrl down}{x}{LCtrl up}
z:: Send {LCtrl down}{z}{LCtrl up}
b:: Send {LCtrl down}{b}{LCtrl up}
~Esc::Send {~}
[::(
]::)
1::!
2::@
3::#
4::$
5:: Send {`%}
6::^
7::&
8::*
9::(
0::)
-::_
=::+
backspace::Del
#If
SetCapsLOckState Off
SetCapsLockState AlwaysOff
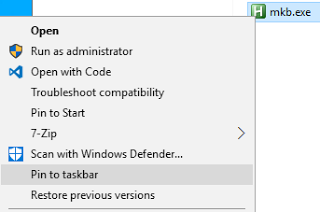
- If you installed AutoHotKey properly then you can right click on this mkb.ahk file and select "Compile Script". If successful you will see a mkb.exe file. Now, place this executable where you desire (such as the root directory of your C drive). Right click on mkb.exe file and click "Pin to Taskbar".
- I would strongly suggest moving the mkb (green H icon) on Taskbar to the first position (closest to the Windows icon), and in this way you can press a key combination (Win + 1) in order to restart the program if need be.
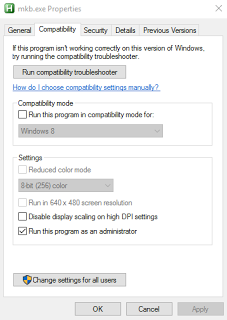
- Right click on the mkb.exe file and click on "Properties", then click on "Compatibility" tab, and ensure to have "Run this program as an administrator", click Apply and OK buttons.
USER ACCOUNT CONTROL
- Windows does NOT like AutoHotKey or programs without some certificate, therefore you may have to tweak User Account Control. Keep in mind that modifying UAC can potentially put you at risk as it removes notifications that could be useful in preventing programs from modifying Windows. It's the gamble you may have to take if you want this to work.
- To modify: Hit Windows key and type "uac", and open the first option, lower the bar as needed.
- If the above does NOT work then do the following:
-- Hit windows key and type "regedit", open it.
-- Go to "HKEY_LOCAL_MACHINE\SOFTWARE\Microsoft\Windows\CurrentVersion\Policies\System" (ensure you click on that last "System" folder.
-- Double click on "EnableLUA" and edit the "Value data:" to be 0 (keep it as Hexadecimal).
-- Click OK button.
-- Restart.
- NOTE OF WARNING: the above may break some default apps in Windows 10 (for example the Photos app wont work if you try to open jpg files, so in this case change the default app to view photos). If your main browser is Microsoft Edge then that will stop working too, however Internet Explorer continues to work. If this is concerning to you then revert that registry change, so set it to 1.
LAUNCH AUTOMATICALLY
- Hit the Windows key and type "Task Scheduler".
- Click Action, then"Create Task".
- Name your new task as "mkb", ensure that "Run whether user is logged on or not" is selected, ensure that "Run with highest privileges" is enabled, and select your operating system for the "Configure for" selection.
- Click on Triggers tab, click New button.
-- Click on "Begin the task" selection and select "At startup", click OK button.
-- Click on New button again, and do "Begin the task" and set to "At log on", click OK button.
- Click on Actions tab.
-- Click New button, leave Action as "Start a program".
-- Click on the Browse button, navigate to where you placed the mkb.exe file, select it, click Open button, then click OK button.
- Click OK button (you may have to type in your Windows password).
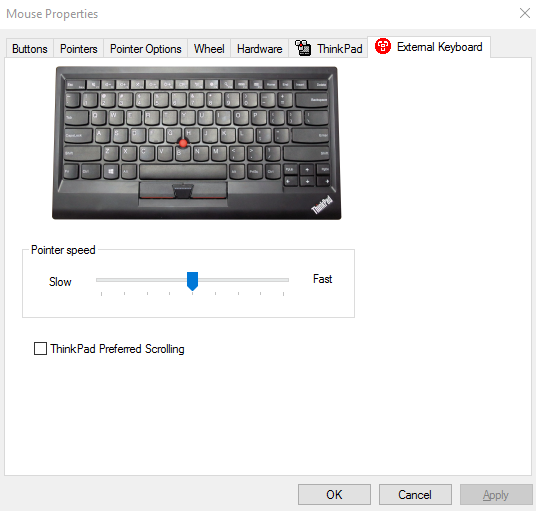
MOUSE POINTER SPEEDS
- Hit the Windows key, type "pointer" and click on the first option. Click on the "External Keyboard" tab and change the pointer speed as needed. Additionally, you may have to do some adjustments under the "Pointer Options" tab.
FINAL NOTES
- If you are to use this keyboard you will still, every once in a while, have to solely rely on keyboard input. So, learn to use tabs and directionals (Fn + ijkl keys) to navigate. Also, recall that Win + 1 restarts the mkb.exe file (if you attached to the TaskBar at the first location).
- This is by no means perfect but it can be quite useful for those that primarily use keyboard input as the primary device. The mouse being something one uses occasionally for that pesky graphical user interface.


No comments:
Post a Comment